
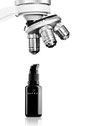
Our work to place products into the media relies on great pictures so carrying on from our blog ‘They say a picture paints a thousand words’ we look at some tips for producing your own product photography.
Richard Jackson from Forever Creative Photography & Design explains, from his experience in product placement photography, some of the essentials worth considering.
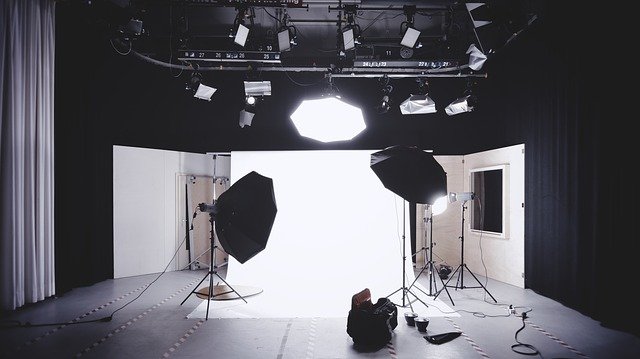
Create your own studio or workspace
Something that can be useful, if you’d like to go it on your own, is creating your own work area, or a mini studio that you can leave in place. This can be very useful as it can help you take images faster and more efficiently and produce an overall consistent style, which is very important when creating or maintaining a brand.

Tether your camera to the computer.
It’s tempting to make a quick decision about images on the back of the camera but it really does pay to be patient and view them on a larger screen, such as laptop, computer or tablet.
It’s quite surprising how many issues arise when viewing the scene larger such as something protruding into the scene or a distracting shadow running across your product. Lots of details are not so obvious on the small LCD screen on the back of the camera and this includes inaccurate colour depiction.
This is why it's best to shoot 'tethered', which is where the camera is connected directly to the computer via cable or Wi-Fi. This makes it instantly possible to check the focusing, sharpness, colour and the overall composition and scene. Entry level DSLRs are actually ahead of the professional models in terms of rolling out Wi-Fi at a reasonable cost and it's worth looking into that if you require a new camera.
Sometimes it takes quite a while to get your scene setup and to get the camera and tripod into the exact right position. Even if you don’t tether, then have a cable connecting the camera to your
laptop if you can. Load up the image so you can view it on the larger screen before continuing to check everything. There’s nothing worse than getting to the end of a shoot and
having to set up previous shots again!
Some of the essentials you may need - and alternatives that don’t cost the earth.
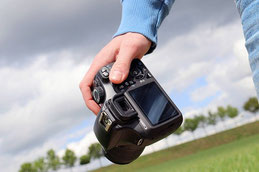
• Camera and Lens.
There really are so many choices, but as a starting point you need a camera that will let you control it manually, preferably a DSLR or similar, where you can change lenses. An entry level DSLR
(cropped sensor) will be fine for most uses and it’s really the quality of the lens that’s going to make quite a difference. A top tip is to always have a second battery on charge so you
can quickly swap them over and not waste valuable time once you've got things set up..
• Background.
Any roll of paper is good to use as a background, depending on the size of your products, you could even use a roll of plain wallpaper. There are so many options here, you can use fabric
too, if you iron it enough first. Mount boards are available in large sizes and an assortment of colours (watch out when re-ordering though as the colours don’t always tend to be
consistent).
• Surfaces.
Quite often I have used old laminate flooring, or preferably real wood flooring. Gluing five pieces together gives a surface area of around 1.2m squared and you then have limitless
possibilities by painting them. If you do manage to find some real wood, these can be stripped, painted, waxed or varnished to accentuate the texture of the grain.
You can even mix and match surfaces/backgrounds depending on what you want to achieve.
• Sprung Clamps.
Available in local hardware stores, or online. These really are so handy, it’s not possible to have too many of them.
• Table.
You can buy tables specifically for product photography by Manfrotto and other brands that incorporate an infinity curve shape in them but I’ve never found these to be flexible enough and prefer
to use a standard square metal table, with the top removed, to allow for lighting from any direction. But basically, any sturdy table, preferably on castors will do just fine.
• Window.
Not really a piece of equipment - but some form of lighting is necessary. Never use your built-in camera flash – there are very few applications for these in product photography as they’re
simply too direct, too harsh and too inflexible. Find an open area next to a window, preferably one with lots of natural light, indirect light is best for product photography as it gives
the most soft and even illumination.
• Reflectors.
White foam board is really good as it’s very lightweight and doesn’t damage other things while you’re moving it around. This is used to bounce light back into the shadows. Small pieces of white
and black card are also handy for blocking or reflecting smaller areas.
• Tripod.
Doesn’t have to be anything fancy, if you only have a light aluminium one, you can always use a sandbag or similar and hang it from the tripod to stabilise it a little. If you do a lot of
overhead shooting, it will save you a lot of time if you have a tripod with a central column that can be moved to a horizontal position, these are generally manufactured by Manfrotto.
More help and information
Howling Moon PR services
Often a new pair of eyes looking at your branding, photography, website etc. can help identify some issues that perhaps you have not been aware of. You might like someone from outside your business to give input on an issue you have. At Howling Moon PR we try and help our clients in whatever way possible so it’s always worth asking if we can help.